Farming Tips
Organic Farming in Nepal: A Beginner's Guide to Getting Started
May 22, 2026 7 min read

Many farmers apply fertilizer by guesswork, but testing soil first saves both money and time. Here's an easy, practical way to test soil at home or with an affordable kit.
Many farmers apply too much or too little fertilizer without realizing it, which neither boosts yield nor saves money. Knowing your soil's pH (acidity) and nutrient levels (nitrogen, phosphorus, potassium) is the only way to know exactly how much and what kind of fertilizer a given crop actually needs. It's a small investment that prevents a much bigger loss.
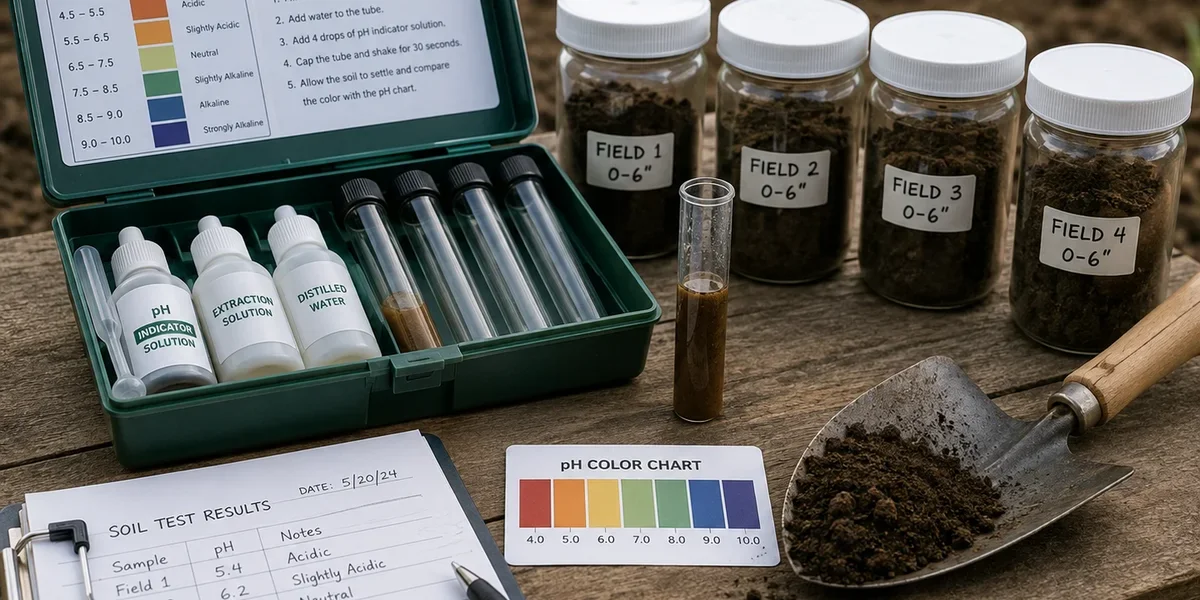
Take soil from 4-5 different spots across the field (spread evenly, not just from the corners), digging down about 6 inches. Sampling from just one spot can give misleading results, since soil conditions vary slightly across different parts of a field.
Combine the soil from all the spots in one clean container and mix thoroughly — this combined sample is what reflects the average condition of the whole field.
Let the sample air-dry in the shade (not direct sun, which can skew results).
A basic pH test kit, available in the market, lets you check soil acidity at home — the typical method involves mixing soil with distilled water in a test tube, adding an indicator solution, and comparing the resulting colour to a pH chart. It's a fast, cheap option.
Sending a sample to your District Agriculture Development Office or a soil testing lab gives you not just pH but exact nitrogen, phosphorus, and potassium levels, which a home kit can't provide. This method takes longer but is far more precise.
If nitrogen shows low, add urea or organic compost; if phosphorus is low, use DAP; if potassium is low, use MOP fertilizer. Consulting a nearby agriculture technician to work out the exact amount for your specific crop is the most reliable approach, since requirements vary significantly from one crop to another.
Testing soil once a year, before planting, is usually enough. For fields growing the same crop repeatedly, testing after every crop cycle is a better idea, since nutrients gradually deplete over time.
Making soil testing a habit before fertilizing pays off for farmers the most over the long run.
Share it with friends and help others discover great content!